When working with any programming project – whether in quantum computing or not – one of the most valuable tools you can in your toolkit is Git. However, using Git can be confusing – and quite intimidating – at the start.
This tutorial is a guide to getting started with Git.
What is Git?
In extremely watered-down terms, Git is a system that helps organize and manage versions of a project.
Consider the following analogy. You are writing a book. You open up a Word document on your laptop, and you type up the first ten pages of your draft. While writing, you have a sudden idea: what if you added a chapter written in first-person perspective from the antagonist’s point of view?
Rather than writing on the original Word document, you make a copy of your existing work and build on it with your new idea in a parallel document. You save the file.
After reading over the work, you decide you like this idea, so you make some minor edits to make sure the storylines matches, and then you send it over to your editor, who merges it into the main draft. You do this over and over again for new ideas, and if you don’t quite like an idea you tested out in parallel, there is no issue – you simply do not merge it into the original draft.
Git is the Word document system that lets you draft up parallel versions, keep track of changes made, and merge these versions together (or even undo your changes). The book you are writing is your project. Saving the file is called a commit, and sending it over to your editor is called pushing the changes. Each new Word document that is “parallel” to the main book draft is called a branch and, as you merge the changes, you are effectively knitting together the versions of code. As you continue to work on your project, you create a tree-like arrangement, and by going from branch to branch, you can keep view different versions of the code.
As such, Git will allow you to keep track of the changes and versions of code you have on hand, making collaboration – where such an organization system is necessary – much more straightforward.
How to Install Git
To connect your files with your Git account, you must first install Git on your device.
To see if you already have git installed, type the following command in your terminal or command line, then press enter:
git versionIf the result returns
git version 2.31.1or some other version (e.g. it recognizes the command), then you have Git installed on your device and can skip this step! Sometimes, some Mac and Linux systems have software that pre-installs Git.
Based on your operating system (e.g. Mac, Windows, Linux), download the correct Git version here (https://git-scm.com/download). Follow the installer guide provided until complete.
Once done, type
git versionone more time to verify you have correctly installed Git.
Create an Account on Github
To keep track of your Git versions and commits, create an account on Github here (https://github.com/signup). You will be asked for some personal information while creating this account, including email, username, and password.
Please note these down, as they will be used to connect your Github account to your local device.
How to Connect Your Github Account to Your Git
Now that you have set up your Github account, return to your terminal. Using the credentials you set up, type in the following command:
git config --global user.name "MyUserName"replacing MyUserName with your associated username in the double quotation marks. If you’re uncertain of whether you set up your username correctly, type:
git config --global user.nameSimilarly, set up your Git email
git config --global user.email "[email protected]"replacing [email protected] with your Github account’s email address. Make sure you have already confirmed your email address before doing so. If you’re uncertain of whether you set up your email correctly, as with before type:
git config --global user.emailFrom there, you will be asked to authenticate your Github account. Simply sign in (log in) using the credentials you set while setting up your account.
How to Create a New Git Repository
Each set of files you want to keep track of in Git is a repository. Log into your Github account. In the top right corner of the banner above the Dashboard, select the “+” button, which will open a drop-down menu.

In the drop-down menu, select “New repository.” Follow the instructions to create a new repository, add a new, description, and set the visibility to your desired settings.
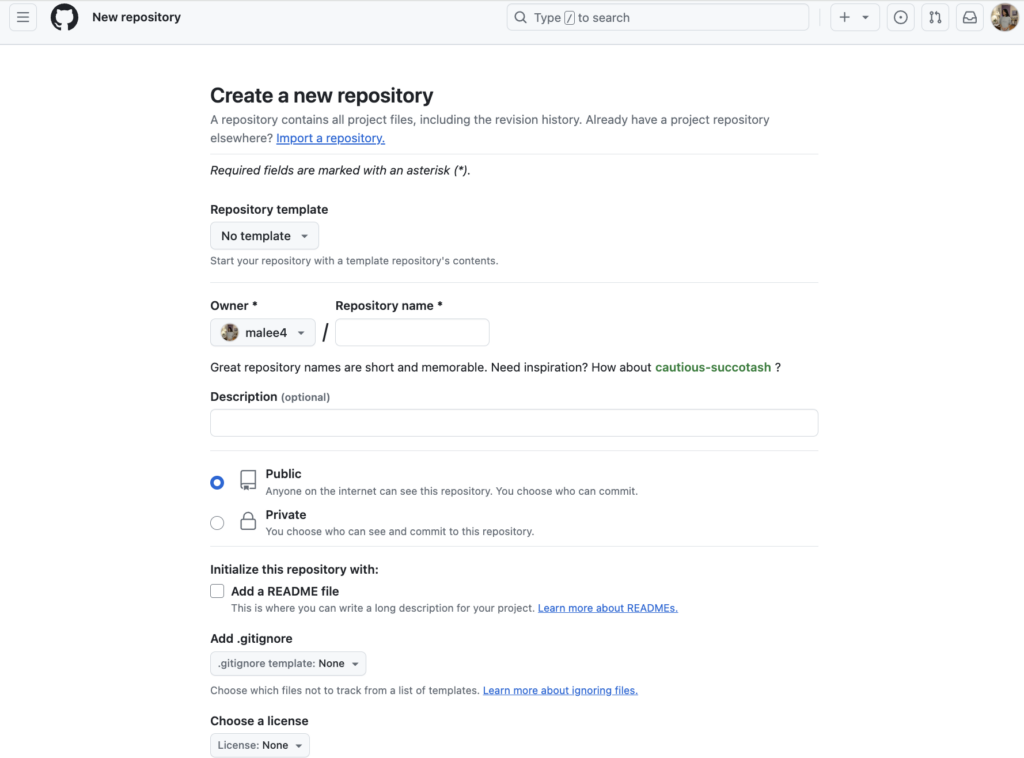
Once done, select the green “Create repository” at the bottom of the page to create a new repository. You will be greeted with the following page:

Copy the HTTPS URL ending in .git – this will be crucial when uploading the code you have stored on your personal device to Github.
Congratulations! You’ve just made your first Git repository (sometimes shortened to “repo”).
How to Add Your Local Code to a New Git Repo
The code you have on your device – or the code you have saved “locally” – can now be pushed to the repository you just created.
To do so, first navigate your terminal or command line to the folder you wish to connect to a remote repository. First, initialize a local Git repository.
git initThen, stage all files in the current working directory (folder) for commit using the following commands.
git add .
git commit -m "my first commit message"
git branch -M main
git remote add origin https://github.com/myfirstrepo.git
Replace https://github.com/myfirstrepo.git with the HTTPS link to the new Git repository you copied at the end of the previous step. The command “remote add origin” tells Git that you want to connect this local repository to the remote (e.g. stored online) repository you created earlier.
Now, to “upload” your code to this remote repository, run
git push -u origin mainSetting Up Private Keys on Your Device
To run code on a quantum computer from your local device, you will oftentimes need to use an access key or API token. For example, your IBM Account for running a quantum computer using Qiskit will have an API token for your use.
Per conventional practice and safety, these access tokens are not generally shared with the public. After all, doing so could give someone else the opportunity to take advantage of your resources or worse.
However, the API tokens, for example, must be used somewhere in the code. Rather than repeatedly deleting and retyping the API token (which can be dozens of characters long), an API key is used.
In your folder containing your Git repository, create a file called “config.py”.
touch config.pyand then open the file
nano config.pyIn the file, enter the API token you wish to store, replacing “api_token” with your desired token name, and the value in the quotation marks, after the equals sign with your actual API token. We include a few examples below.
api_token = 'mytoken'
secret = '12345'
other_secret = 'ABCDEF'
To access the value stored in this file in, say, a Python script, use
import config
MY_API_TOKEN = config.api_token
Now, to ensure config.py is not uploaded to Github, outside of your local computer, create a .gitignore file and put the name of the files you want Git to not touch during code commits and pushes. In other words, run the following commands in your command line or terminal:
touch .gitignore
nano .gitignore
Then, put the following line in the .gitignore:
config.pySave and exit out of the file.
Now, you have a way of accessing your API tokens for access to a quantum computer without exposing it to the outside world.
You are now prepared to jump into your first quantum computing project. Happy coding!